Pages

Friday, April 29, 2011

Ferry Plaza Farmers Market and Market Bar in SF


Last Saturday, we spent a wonderful morning with my favorite sister in San Francisco! We went to the Ferry Plaza Farmers Market and then had brunch at Market Bar. I wasn’t overly impressed with the produce—the quality is pretty much the same as other farmers markets I visited and the price tended to be more expensive since this is a very touristy attraction. But there are lots and lots of yummy samples to try and the whole area is relatively clean! I have realized that I prefer touristy over the down and dirty of authenticity.

After strolling through the market and trying samples, we sat outside and had lunch at Market Bar. I personally did not think the food was that great—I had a rather mediocre omelet and we had to wait a really long time for our food. However, our server was really attentive and we had a good time relaxing and enjoying the morning (minus a couple minutes when three naked guys rode by on bikes, giving us tourists a San Francisco welcome).

On our way back to our car (yay, we found street parking!) we also walked through the open area where artists were selling prints, jewelry, and other touristy knick-knacks. I think those are also always fun to browse! 

This is another trip I would definitely do again. =)


Tuesday, April 26, 2011

Roasted Vegetable Pasta

Basically made with what was around the house, I decided to record this "recipe" because I liked how it turned out and I want to remember it for next time. The measurements are also general estimates...but this sauce is so flexible you really can't go wrong!

Roasted Vegetable Pasta


Ingredients:
  • 2 Italian squash, chopped
  • 1 yellow bell pepper, chopped
  • ½ red onion, chopped
  • ½ white onion, diced 
  • 3 cloves garlic, minced
  • 2 tbsp. balsamic vinegar
  • ¼ c. tomato paste 
  • ½ c. red wine 
  • 2 -14 oz. cans diced tomatoes, drained 
  • 1 tsp. crushed red pepper, or to taste
  • 1 lb. pasta, cooked according to package directions 
Directions: 

1. Toss diced squash, bell pepper, and red onion with olive oil (1-2 tablespoons) and sprinkle with salt and pepper. Roast for 25-30 minutes in 450° oven.

2. Meanwhile, heat a tablespoon of olive oil over medium heat. Add onions and sauté until softened. Add garlic and sauté for another minute or so.

3. Add balsamic vinegar, tomato paste, and red wine. Turn up heat and reduce sauce by half. Add diced tomatoes, crushed red pepper, and bring to a simmer.

4. Stir in roasted vegetables, toss with cooked pasta.


I also made some breaded chicken tenders on the side, topped with melted parmesan cheese for Al. =)

Wednesday, April 13, 2011

DIY Recycled Magazine Bowls Revisited


I first posted about magazine bowls when I was trying to come up with a project for middle school kids to do.  Since then, I have folded hundreds of magazine pages into bowls, and I wanted to update my post with a more complete how-to for making these bowls.  I still think they would make really cool wedding centerpieces for an eco-friendly wedding.  The key to making more elegant-looking bowls is to use smaller strips.  I cut magazine pages into strips approximately 2 inches wide.

Materials:
~ old magazines
~ scotch tape
~ rubber band (optional)
~ mod podge or glue


1. FOLD: The main task for making the bowls is to fold!  Fold each strip of paper in half.   Open up the strip and fold both edges toward the center.  Fold the entire strip in half again along the center fold.  Repeat!

A stack of folded strips--this is only a fraction of how many I folded! 
 2. TAPE: tape each end of the strips together.  Make sure the strips do not overlap and that the folds are facing the same direction.

3. ROLL: As tightly as possible, roll your strips in a tight coil, keeping everything as even and tight as you can.  If you want to take a break from rolling, just put a rubber band around the coil to keep it from unraveling.  Tape the end of the last strip down to hold the coil.


4. SHAPE: Carefully shape your bowl by raising the edges of your coil.  You can make it as shallow or as steep as you like.

5. SEAL: Once you have attained your desired shape, seal the bowl with a coat of Mod Podge on both sides.  Seal the inside of the bowl first, allow it to dry so it holds its shape, then turn it over and seal it on the other side.  I used elmer's glue which also worked fine, but I think mod podge has a better finish.

Have fun!

(BTW, my strips were actually from book covers--I had a huge stack of them and couldn't resist the alternating black and white pattern)

Tuesday, April 12, 2011

DIY Wood-stamped fabric


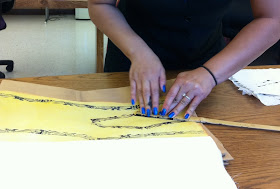
I saw one of my extremely creative and crafty co-workers working on stamping a piece of fabric for a costume.  As I watched, my mind started spinning with all the possible projects you could make with a wood stamp.  I love how stamping makes something look so original and hand-made.  For our wedding, we had wanted to bring in a slightly tropical/beach theme without making it look too casual.  I would have loved to have stamped my own fabrics to use as an aisle runner or tablecloths.
Pareos (similar to sarongs) originated from ancient Tahiti and were pieces of fabric that were tied and worn as various clothing pieces.  The fabric was often vibrantly colored with a watercolor effect due to salt that was sprinkled on after being dyed.  Bark and other natural resources were then used to stamp designs on the fabric.
You can create your own pareo-like fabric by dying and stamping your own fabric.  I am very grateful to Louriel for showing me the process!
Materials:
  • wooden stick (size depending on how large you want your stamp)
  • wood-carving knife
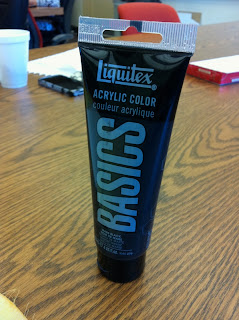
  • black acrylic paint
  • paintbrush
  • fabric
  • dye (optional for fabric)
  1. First, make your wooden stamp.  Sketch your design on your piece of wood.  Use the wood-carving knife to trace over the lines of your sketch.  Continue to carve into the lines until you’ve achieved the desired width for each line.  Louriel suggests making a design with straight lines and edges if you are new to wood carving.  Create a symmetrical design so that the stamps can connect together in a line, or draw a stand-alone design.

2. (Optional) Dye your fabric if you so choose.

3. Prepare your stamp.  You may need to thin your acrylic paint with water before using it on your fabric.  Test your stamp a few times before starting with the fabric.  Using a paintbrush, brush your wooden stamp with an even coat of paint.  Blot the sides of your wooden stamp with a paper towel to avoid stray stamp marks or a stamped box around your design.


4. Stamp!  Press your wooden stamp firmly on your fabric to stamp.  Then repeat step three again to prepare for the next stamp.  If your stamp does not stamp evenly on your fabric, Louriel suggests layering paper or something soft under the fabric so that the fabric picks up all parts of the stamp design.  (Again, practice first!)


Voila!  Thanks Louriel! =)