Showing posts with label Projects. Show all posts

Thursday, January 12, 2012

Cardigans for Mom

This is a little belated, but I wanted to finally share December's completed projects!  After frantically knitting all night before Christmas, I was able to finish a cardigan for both my mom and Al's mom for Christmas.  I chose two patterns that were pretty easy to follow and didn't take as much time as the cabled pattern that I knit for Al last year.


I made this cardigan for my mom with a bamboo ewe yarn by Stitch Nation and followed the My Fair Cardi pattern.  I followed the instructions and measured my garment according to directions for a Medium sized cardigan, but it still turned out a lot smaller than I thought it would.  I don't know if it's just me, being an amateur knitter, or the pattern, but I have now mentally noted to take more notice of the size of the pieces as I knit them so I can adjust accordingly in the future.


I made this cardigan for Al's mom using a silky bamboo yarn by Naturally Caron and followed the Baton Rouge Cropped Jacket pattern.  I didn't realize until after I was nearly finished that I actually was using a different yarn than the one on the pattern (mine was spa, the yarn in the pattern was country).  I liked the pattern, but I wasn't a huge fan of the yarn.  The silky yarn was very soft, but it snagged easily (I have rough hands!) and was not woven very tightly, so my knitting needles often only picked up part of the strand.  (Again, that might just be because I'm just an amateur knitter!)

I can't wait until my next knitting projects, but it might have to wait awhile--my hands and wrists are still recovering!

Monday, November 21, 2011

DIY Cinderella Pumpkin Carriage Centerpiece


When I saw white pumpkins a few weeks ago, I immediately saw the potential for a really fun project.  How can you see a pumpkin and not think of Cinderella's fairy tale pumpkin carriage?  It took awhile to think through how to make the carriage happen, but now I'm really happy with the results! The hardest part was coming up with a practical way to make the carriage wheels--I tried to find cheap wooden wheels that I could buy, but in the end it was much easier and cheaper to make them myself.  So for a fairy tale wedding centerpiece or a fun project, here's how to make a real pumpkin carriage:

Materials for wheels:
- wire
- modeling clay
- glue and paper for paper mache
- two bamboo skewers or wooden dowels
- hot glue gun

To make the wheels:
Step 1: Twist pieces of wire to form wheels.  Make two slightly larger than the other two.  (Twist one longer piece into a circle, then make spokes by twisting three short pieces across the diameter of the circle).  Press a piece of clay into the center to hold the spokes in place.

Step 2:  Cover the wire wheel with modeling clay to make it thicker.

Step 3:  To harden the wheels, paper mache each wheel with strips of paper dipped in watered-down glue.  Let each wheel dry completely before proceeding to step 4.

Step 4:  Paint each wheel with gold paint (or color of your choice).

Step 5: Cut your wooden skewers so that the wheels will rest against the pumpkin after you attache the wheels.  (This will be about the width of the pumpkin).  Paint two skewers or dowels with gold paint.  With a hot glue gun, glue the wheels to each end of the skewer.

*An alternative way to make the wheels is to buy clay that you can bake, and simply mold the wheels and paint them after they harden.  I didn't feel like spending the extra couple dollars to buying that kind of clay--hence the wire and paper mache steps.  

Materials for carriage:
- white pumpkin (or you can use an artificial carvable pumpkin like Funkins)
- carving tools (or for me, just a knife)
- gold puffy paint
- gold ribbon
- pins

Scoop out your pumpkin and carve out the windows for the carriage on both sides of the pumpkin.  (This is actually the first pumpkin I've ever carved, so I don't have any good tips, and I'm pretty sure my carving is pretty sloppy!)  Use gold puffy paint to outline the windows.

Decorate the pumpkin with gold ribbon by pinning the ends of the ribbon on the inside rim of the hole at the top of the pumpkin and at the bottom of the pumpkin.  Use gold puffy paint to add any other detailed decoration to the pumpkin.  Attach the carriage wheels to either side of the pumpkin.  Hot glue will hold the wheels in place, but can easily fall off.  You can attach the wheels more securely by "stapling" the dowel to the side of the pumpkin by bending a piece of wire into the pumpkin on both sides of the dowel.

Light a candle inside the pumpkin and place in a ring of ivy for a cool centerpiece!

Have fun!

Friday, August 5, 2011

DIY White Vases from Recycled Bottles


I have wanted to make these vases for awhile, but couldn't figure out exactly how I wanted to do them--Al has patiently put up with my collection of glass bottles as I experimented with creating these textured white vases.  Using just spray paint and puffy paint, you can turn your old glass bottles into fun vases.


Materials: glass bottles, spray paint, puffy paint, and a paint brush
Tip: Soak the glass bottles in warm water to help remove the labels.  If you are planning on making a completely textured vase, you don't need to be as meticulous in removing the adhesive since it will all be covered.

The Original Vase-- This is the idea I first saw, from which the other vase ideas came about.

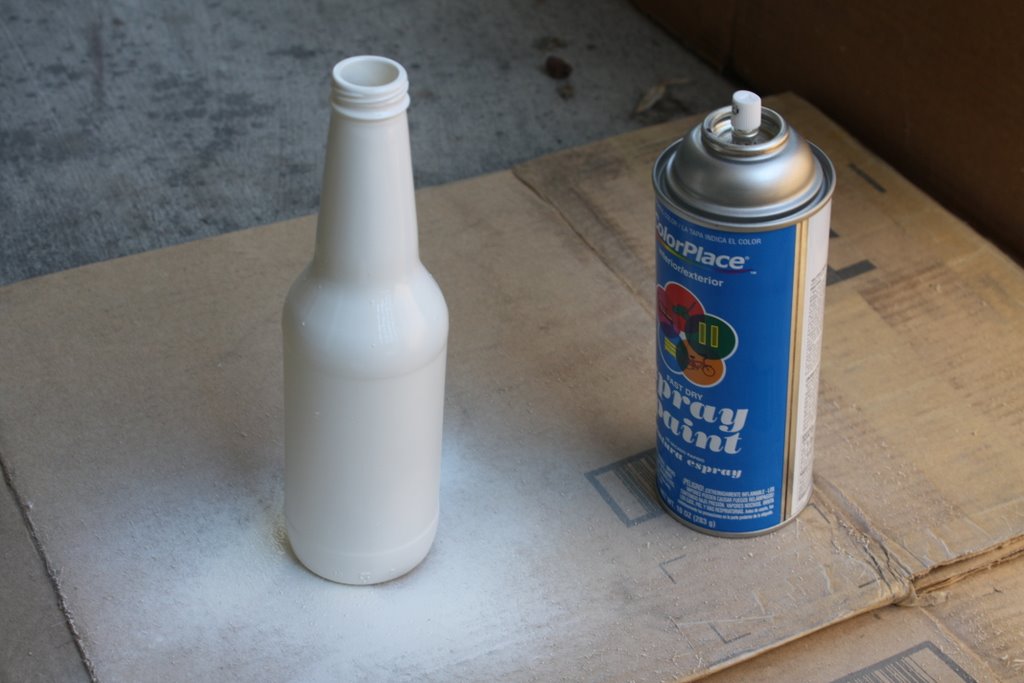
1.  Spray paint the entire bottle with your desired color.  It is better to spray on layers rather than a thick coat to cover the glass.  If you spray the paint too thickly, the paint will run and you won't have a smooth surface.  Give each layer about 4 hours to dry before spraying on the next layer.

2.  Use puffy paint to paint on a dotted pattern.  Allow to dry, and you're done!


Vase Version 2:

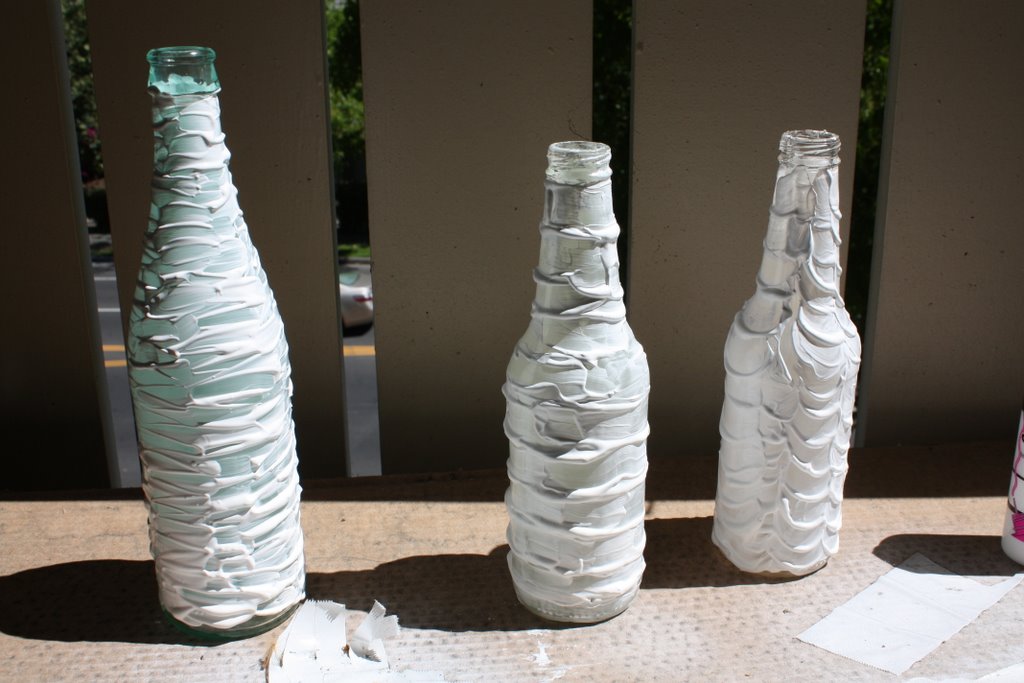
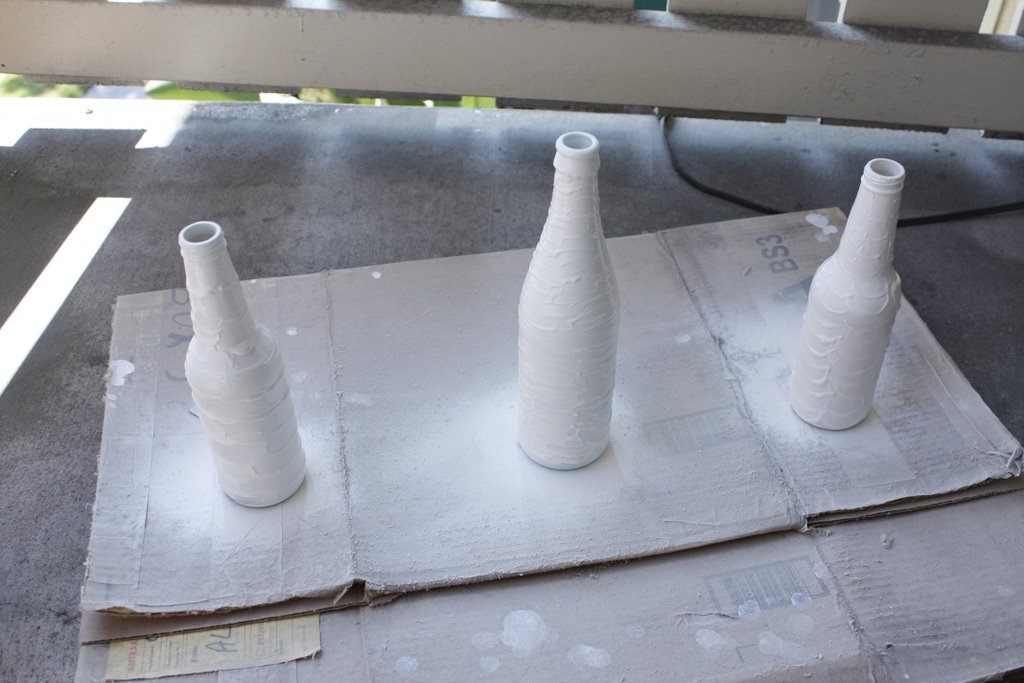
 I wanted to create a texture over the whole vase, so I reversed the steps by applying puffy paint first, and then spray-painting the vase.  The pictures are pretty self explanatory: I used a brush to spread globs of puffy paint all over the glass bottle.  In the other two vases, I experimented with creating other effects such as rings around the vase and a scalloped pattern.


Simple wedding centerpieces: 
Line up rows of vases with a large bloom and you can have an economic and unique centerpiece for your reception:

Have fun!

Tuesday, August 2, 2011

DIY Plastic Canvas Pencil Boxes


I found this really great tutorial on making pencil cases by weaving yarn through a plastic canvas.  I love how there are so many different ways to weave the yarn pattern to create a different look.  Check out Diane Gilleland's free pattern that is very thorough on how to make these cute cases.  (My button is monstrous in comparison to the rest of the case, but I was too lazy to get another one!)

After making this first case, I was inspired to use my leftover plastic canvas and yarn to make another pencil box with the same pattern idea:

Like the above case, the only basic materials needed are yarn, plastic canvas, and a yarn needle.  I actually broke my plastic yarn needle as it was slightly bigger than the holes in the canvas, so I actually bent a paper clip into a makeshift yarn needle and found that it worked out really well.

After weaving a yarn pattern on each piece, sew them together to make a box.  (See Diane Gilleland's tutorial for details on weaving the yarn)

Sew buttons on the side and tie yarn loops on the lid of the box to make "button holes."

And that's it!  Such a simple craft with endless possibilities =)

Friday, July 1, 2011

Wednesday, June 29, 2011

DIY Stitched Thank-You Cards


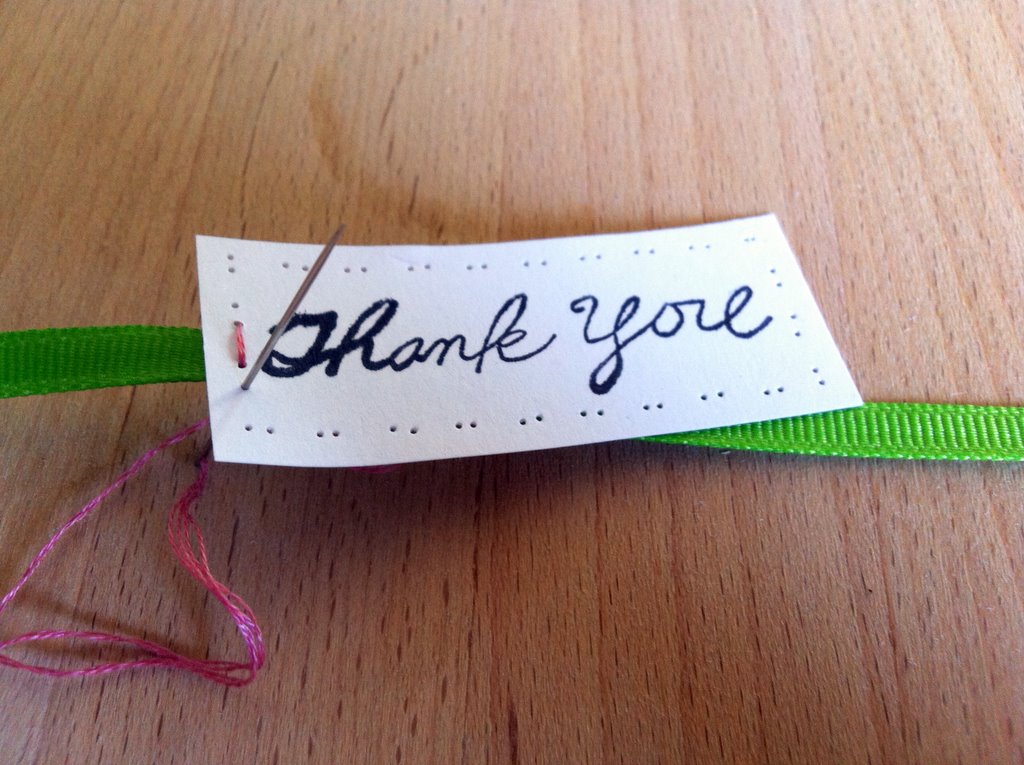
I recently "made" a bunch of these thank-you cards because I had a lot of time on my hands and a lot of thank-you cards to write.  I wanted to add a personal touch to my thank-you cards and I thought this was an easy way to dress up some blank cards.  The fun part is that you can just buy a bunch of blank cards and easily turn them into cards of congratulations, happy birthdays, and thanks.  The key to stitching on cardstock is that you need to punch the holes first so you don't end up wrinkling or tearing the cardstock.

Materials:

Blank cards, cardstock, ribbon, embroidery thread and needle, stamp and ink pad, cardboard

 Instructions:
1. Cut cardstock "labels"  (labels pictured above are 2.5"x1")

2.  On one piece of cardstock, mark where you want to make holes for the stitches to border the label.  I spaced the stitches 1/16" apart and made each stitch 1/8" long.  This will be your template.

3.  Tape two sides of the template down onto a piece of cardboard (or something you can poke holes into).  Slide a second label behind it.

4.  Using a needle, poke holes through the cardstock where marked.

5.  Remove the label.  You will now have holes punched out for the stitches.

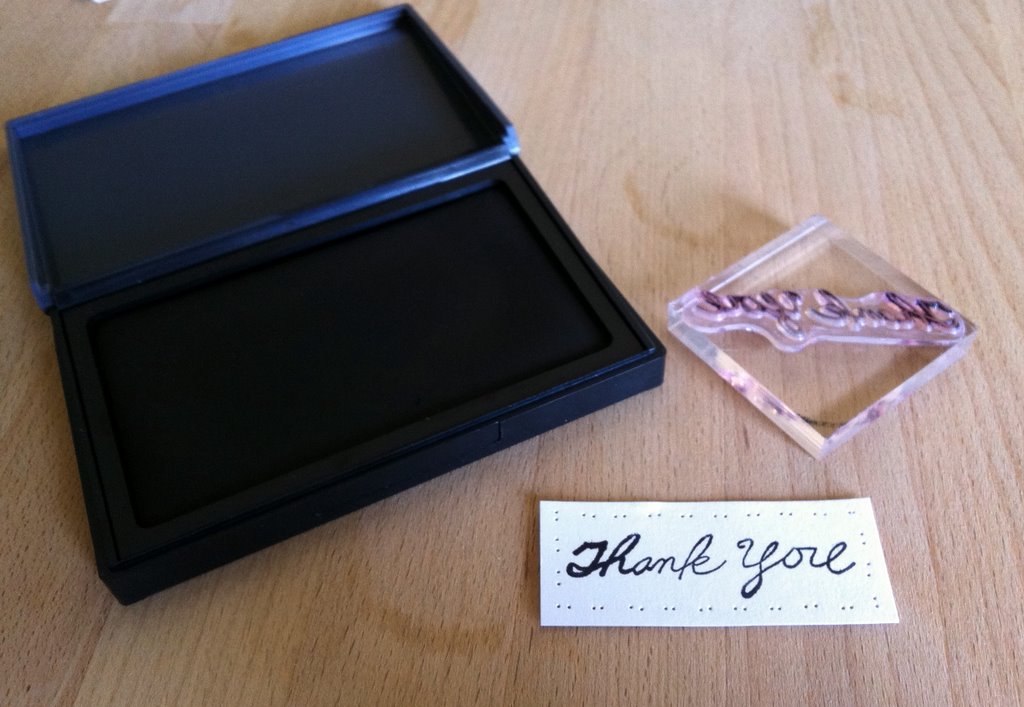
6.  Stamp message in center of label.

7.  Using two strands of embroidery thread, stitch along the punched out holes.  As you stitch, place the label in the center of a length of ribbon and stitch through the ribbon on both ends.


8.  Center the ribbon and mark with a needle where to sew the ribbon together.  (Or you could be less lazy than me and actually measure precisely how long the ribbon should be--at any rate, sew it up!)

9.  You now have a pretty loop that you can slide onto any blank card.


Have fun!

Wednesday, April 13, 2011

DIY Recycled Magazine Bowls Revisited


I first posted about magazine bowls when I was trying to come up with a project for middle school kids to do.  Since then, I have folded hundreds of magazine pages into bowls, and I wanted to update my post with a more complete how-to for making these bowls.  I still think they would make really cool wedding centerpieces for an eco-friendly wedding.  The key to making more elegant-looking bowls is to use smaller strips.  I cut magazine pages into strips approximately 2 inches wide.

Materials:
~ old magazines
~ scotch tape
~ rubber band (optional)
~ mod podge or glue


1. FOLD: The main task for making the bowls is to fold!  Fold each strip of paper in half.   Open up the strip and fold both edges toward the center.  Fold the entire strip in half again along the center fold.  Repeat!

A stack of folded strips--this is only a fraction of how many I folded! 
 2. TAPE: tape each end of the strips together.  Make sure the strips do not overlap and that the folds are facing the same direction.

3. ROLL: As tightly as possible, roll your strips in a tight coil, keeping everything as even and tight as you can.  If you want to take a break from rolling, just put a rubber band around the coil to keep it from unraveling.  Tape the end of the last strip down to hold the coil.


4. SHAPE: Carefully shape your bowl by raising the edges of your coil.  You can make it as shallow or as steep as you like.

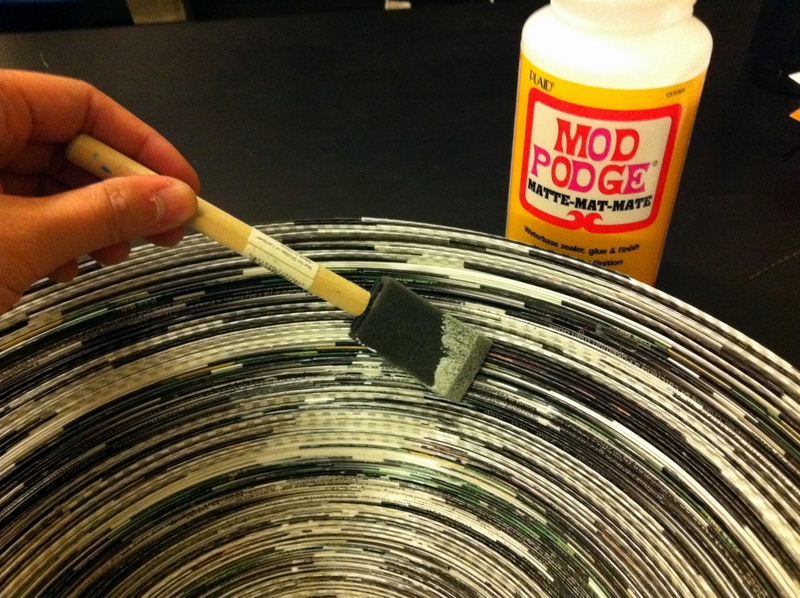
5. SEAL: Once you have attained your desired shape, seal the bowl with a coat of Mod Podge on both sides.  Seal the inside of the bowl first, allow it to dry so it holds its shape, then turn it over and seal it on the other side.  I used elmer's glue which also worked fine, but I think mod podge has a better finish.

Have fun!

(BTW, my strips were actually from book covers--I had a huge stack of them and couldn't resist the alternating black and white pattern)