On Saturday morning, I open my eyes to a pretty gray and wet day. As I'm trying to decide whether I'm still sleepy enough to fall back asleep, I ask Al (who is apparently just woke up and is lying there playing with his iphone) what time it is. He tells me it is already noon. Wow, I must have been really sleepy.
So I get up, brush my teeth, ask Al if he wants the leftover Thai food for lunch (he says yes), and I heat up everything in the microwave. We sit down at the table, Al says grace, and we start to eat. I pick up my phone to check messages, etc. when I see the time. It is 9:30 AM!!!!
My mouth drops, Al is laughing, and I can't believe it took me so long to figure out the real time.
+1 for Al.
However, the result of his prank was no lunch when noon actually rolled around!
Now it's my turn to get him back.
Sunday, November 21, 2010

Saturday, November 20, 2010
Planet Granite Bloc Party
Rock climbing comp! Planet Granite's Bloc Party Series Final was on Friday night. Al climbed hard and we had a good time. I mostly wanted the free t-shirt =P It's been a long time since we've participated in a comp and I glad to be there even though my climbing still has a long way to go to get back to pre-injury shape.
Here are some pics!


From our grainy pictures, the gym looks deceptively empty. It was actually REALLY crowded, but not completely annoying since comps always have such a great energy. PG is starting to feel more familiar, but we still miss Sportrock!
Here are some pics!




From our grainy pictures, the gym looks deceptively empty. It was actually REALLY crowded, but not completely annoying since comps always have such a great energy. PG is starting to feel more familiar, but we still miss Sportrock!
Tuesday, November 16, 2010
Watermelon Smoothies
The Problem:
Two thirsty people have half of one big watermelon and are too lazy to slice the watermelon to eat it.
The Solution:
Use an ice cream scoop to scoop out watermelon. Place in blender with ice, a dash of sugar, and a squeeze of lime. Result: Watermelon Smoothies! =)

Al got really good at making these. The proportions are about 2 cups of watermelon, 1 cup of ice, 1 tbsp. of sugar, and the juice of half a lime. In retrospect, maybe these weren't really less work than just cutting up the watermelon and eating it (maybe about the same?) but they were definitely more refreshing!
Two thirsty people have half of one big watermelon and are too lazy to slice the watermelon to eat it.
The Solution:
Use an ice cream scoop to scoop out watermelon. Place in blender with ice, a dash of sugar, and a squeeze of lime. Result: Watermelon Smoothies! =)

Al got really good at making these. The proportions are about 2 cups of watermelon, 1 cup of ice, 1 tbsp. of sugar, and the juice of half a lime. In retrospect, maybe these weren't really less work than just cutting up the watermelon and eating it (maybe about the same?) but they were definitely more refreshing!
Saturday, November 13, 2010
Country Captain Chicken
Recipes:

I still don't know what exactly country captain chicken means, but based on the recipe we used I'm assuming it means something yummy and delicious! The curry mix was a little annoying to make in the recipe because you had to grind a lot of spices, but I thought it was worth it. I also used boneless chicken breast (on sale!) cut into bite size pieces because Al likes easy-to-eat meals. I was really surprised by just how tender the meat became when it finished baking in the oven! The coconut rice was also really good, and it just makes me sad that the coconut milk has to add fat to our meal. (Again, worth it). I will definitely make coconut rice again for any other curry-like dishes.
The red onions had a wonderful sweet flavor from the pomegranate molasses. Now that I finally bought a jar of pomegranate molasses, I can't wait to go back and look for recipes that I've skipped over in the past since I never felt like buying it. In my opinion, the gremolata did not enhance the dish at all (I think it was the orange zest) and I would rather just sprinke some parsley and fresh pomegranate seeds over the onions instead.
Disclaimer: I did not originally mean to post so many pictures of food and recipes, but we love to eat so here they are!

- Throwdown's Country Captain Chicken
- Roasted Red Onions with Pomegranate, Orange, and Parsley Gremolata

I still don't know what exactly country captain chicken means, but based on the recipe we used I'm assuming it means something yummy and delicious! The curry mix was a little annoying to make in the recipe because you had to grind a lot of spices, but I thought it was worth it. I also used boneless chicken breast (on sale!) cut into bite size pieces because Al likes easy-to-eat meals. I was really surprised by just how tender the meat became when it finished baking in the oven! The coconut rice was also really good, and it just makes me sad that the coconut milk has to add fat to our meal. (Again, worth it). I will definitely make coconut rice again for any other curry-like dishes.
The red onions had a wonderful sweet flavor from the pomegranate molasses. Now that I finally bought a jar of pomegranate molasses, I can't wait to go back and look for recipes that I've skipped over in the past since I never felt like buying it. In my opinion, the gremolata did not enhance the dish at all (I think it was the orange zest) and I would rather just sprinke some parsley and fresh pomegranate seeds over the onions instead.
Disclaimer: I did not originally mean to post so many pictures of food and recipes, but we love to eat so here they are!
Wednesday, November 10, 2010
Wedding DIY: CD Favors
 |
| http://www.favorstudio.com/petal-cd-covers.aspx |
Resist the urge to make another romantic compilation that, in all honesty, may never even make it to the CD player (or iPod). Think about making a playlist that you would listen to while doing something you and your fiancé enjoy—if you love to travel, make a road trip mix. Make a dance mix, a karaoke mix, a tailgating mix….you get the idea.
CD favors are incredibly budget friendly--spools of CD-Rs and printable labels make each favor cost very little. You really just need the patience to burn each CD and to check to make sure each CD is burned properly.
Another fun part of CD favors comes with the packaging. There are endless possibilities for how to present your CD favor, and here is just one simple way you can make a CD case with a piece of cardstock and a ribbon. You can buy petal CD cases at the website above, or you can easily make your own. (Please excuse the bland colors, they happened to be the only cardstock and thick ribbon I had available)
Petal CD Case:
Materials:
- 12 X 12 cardstock
- scissors
- ribbon


2. Mark 2.5 inches out from the center of each side. This is how far each petal will extend. Align the top of the curve of a CD to each mark and trace a curve from corner to corner.


8. Press the edges down firmly to close.

9. Secure with a ribbon or a sticker, personalize with your own tags or labels.
Have fun!
Saturday, November 6, 2010
Arroz con Pollo with Salsa Verde
Spanish Themed Dinner Night:
Recipes:

Instead of a whole chicken, I used 5 chicken legs because that was what was on sale and therefore in my fridge. =) I think I would continue to use chicken legs in the future since bone-in chicken breasts just take so long to finish cooking in the oven. I also used canned tomatoes with green chilies because that was also in our pantry--I don't know if the green chilies made any difference, but it was delicious! As usual with baked chicken recipes, I always have to bake the dish longer for the chicken to finish cooking. This time, it took about 25 extra minutes.
For the salsa verde, I used a Bon Appetit recipe because I wanted to try a more authentic salsa verde recipe with tomatillos. For the record, I used 4 jalapenos.
Lastly, I made the Spanish-style potato omelet in order to use up a lot of eggs that were sitting around in the fridge. Instead of making the mayonnaise topping with the recipe, we just ate it with the extra salsa verde.

Recipes:

For the salsa verde, I used a Bon Appetit recipe because I wanted to try a more authentic salsa verde recipe with tomatillos. For the record, I used 4 jalapenos.
Lastly, I made the Spanish-style potato omelet in order to use up a lot of eggs that were sitting around in the fridge. Instead of making the mayonnaise topping with the recipe, we just ate it with the extra salsa verde.
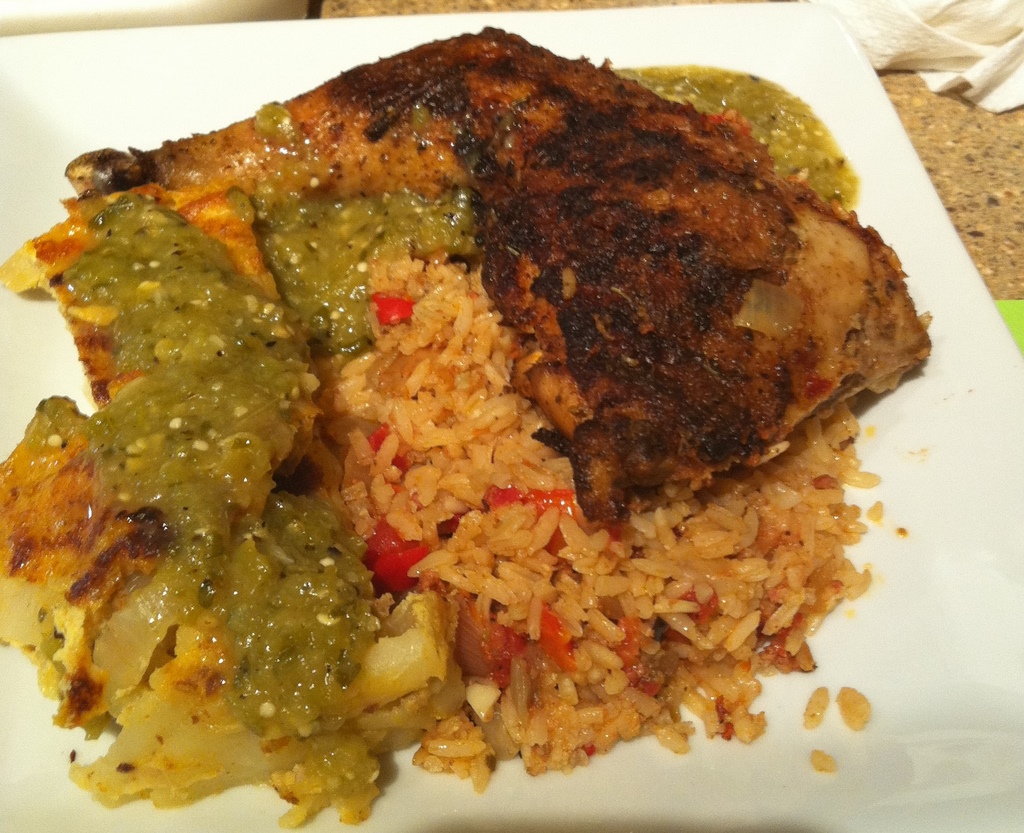
The full meal pictured above. No, I am not a photographer. No, I am not an iron chef (no plating points!).
Thursday, November 4, 2010
Wedding DIY: Ribbon-laced paper cones

Background:
Grace and I made these paper cones for her wedding and they were surprisingly easy and fun to make! The shimmery, linen-washed cardstock made the cones look super elegant for her wedding and they were only 20 cents each! (on sale at Joann Fabrics). I thought that lacing the ribbon on the cones would be a nice touch since the back of Grace's dress was laced up with a really long ribbon. So here's how it's done:
Materials:
- Cardstock
- Ribbon
- A Yarn needle or sturdy tape
- Scissors or X-acto knife
- Hot glue gun
- Flowers
Directions:
1. Make a template. (If making more than one cone, mark a single sheet of cardstock with where to cut holes. Then reuse the sheet so you know where to cut the holes in the rest of the sheets) a. Cut the square of cardstock to 10 x 10 inches. Position the square in the shape of a diamond and, for the purpose of these instructions, imagine each corner is a cardinal direction (North, East, South, and West)
b. Make a mark 2.25 inches to the right and left of the West and East corners
c. Draw a line connecting each mark to the South corner
d. Measure one inch from the top of each line and make a mark. Then make three marks at every 1.5 inch increment
e. Now at every 1.5 inch increment, make a mark 0.75 inches to the left and right of the line. See the first picture in the slideshow for details. These 8 marks will be the holes through which the ribbon will be laced. Make mirroring marks on the other line.

2. Using scissors or a knife, cut slits wide enough for ribbon to be laced through each mark. (Tip: cut the cardstock over a board of Styrofoam.
3. Cut a strand of ribbon—48 inches. If you don’t have a yarn needle, tape each end of the ribbon with tape and cut to a point. (This will make it easier to thread through the cardstock)

4. Starting at the bottom two holes from the inside of the cardstock (the wrong side), lace ribbon through and make sure both ends are the same length.

5. Roll cone into shape so that the holes align with each other. Lace the ribbon as if lacing your shoelaces. TIP: lace one side at a time and keep the cone loose until the ribbon is in place. Then hold cone steadily in place and pull ribbon tight.
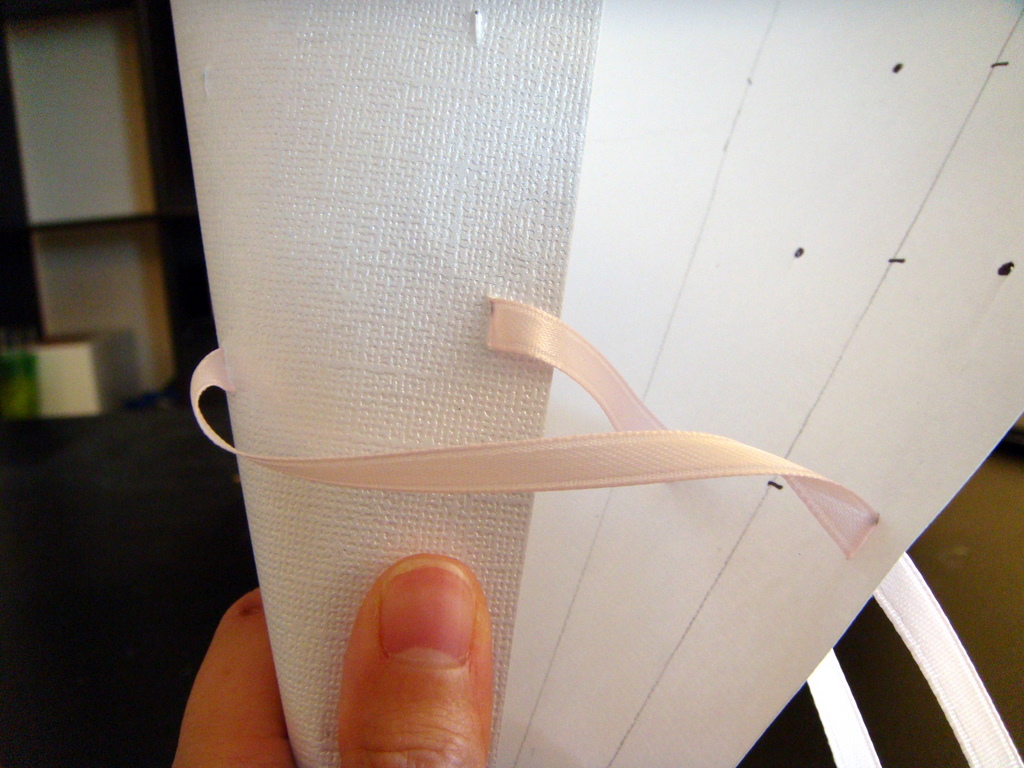


6. If desired, tie a bow at the top of the cone.

7. Use hot glue to secure the edge of cardstock against the cone.

8. Fill the cone with flowers and string ribbon through the top of the cone so that you can hang it where you wish.

Have Fun!
Subscribe to:
Posts (Atom)