Wednesday, June 29, 2011

DIY Stitched Thank-You Cards


I recently "made" a bunch of these thank-you cards because I had a lot of time on my hands and a lot of thank-you cards to write.  I wanted to add a personal touch to my thank-you cards and I thought this was an easy way to dress up some blank cards.  The fun part is that you can just buy a bunch of blank cards and easily turn them into cards of congratulations, happy birthdays, and thanks.  The key to stitching on cardstock is that you need to punch the holes first so you don't end up wrinkling or tearing the cardstock.

Materials:

Blank cards, cardstock, ribbon, embroidery thread and needle, stamp and ink pad, cardboard

 Instructions:
1. Cut cardstock "labels"  (labels pictured above are 2.5"x1")

2.  On one piece of cardstock, mark where you want to make holes for the stitches to border the label.  I spaced the stitches 1/16" apart and made each stitch 1/8" long.  This will be your template.

3.  Tape two sides of the template down onto a piece of cardboard (or something you can poke holes into).  Slide a second label behind it.

4.  Using a needle, poke holes through the cardstock where marked.

5.  Remove the label.  You will now have holes punched out for the stitches.

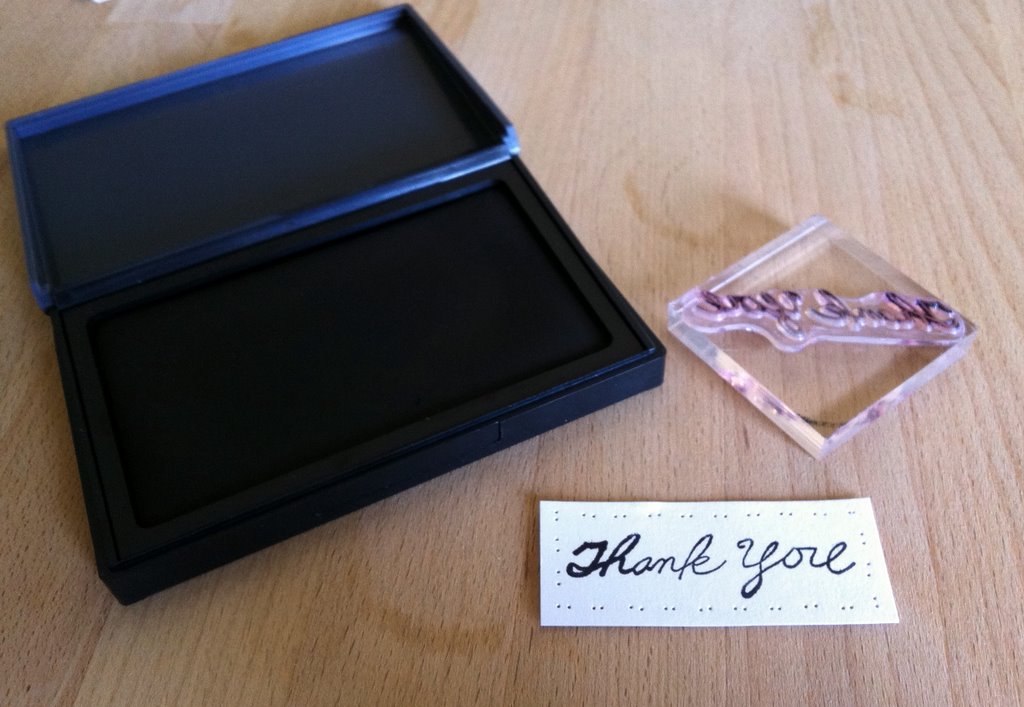
6.  Stamp message in center of label.

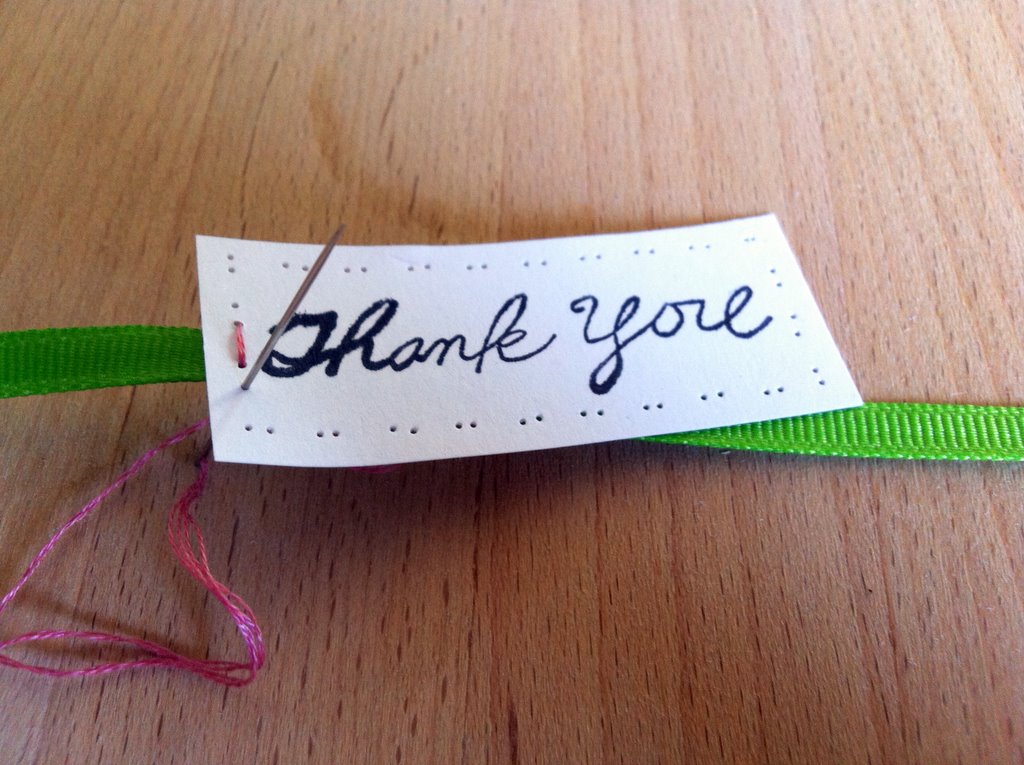
7.  Using two strands of embroidery thread, stitch along the punched out holes.  As you stitch, place the label in the center of a length of ribbon and stitch through the ribbon on both ends.


8.  Center the ribbon and mark with a needle where to sew the ribbon together.  (Or you could be less lazy than me and actually measure precisely how long the ribbon should be--at any rate, sew it up!)

9.  You now have a pretty loop that you can slide onto any blank card.


Have fun!

Friday, June 24, 2011

DIY Wedding Invitations


I decided to make our wedding invitations because I thought it would be a money-saver and, as usual, I love to impose projects on myself where I grossly underestimate the time and effort that would be required. Time and effort aside, there is something just so alluring about doing something completely myself so that I can be in control of every personal touch of my project.  In retrospect, now three years later, I laugh at how much time I put into these invitations--what do people do with invitations anyway?  Don't they usually just end up in the trash?


For our invitations, I don't think I did anything particularly innovative or cool--what I really came to appreciate was the usefulness of Martha Stewart's line of paper punches.  I thought the punched out flowers were exactly what I was looking for for my invitations, and I was super excited to find them.  This also led to my discovery of Glue Dots--which are like little circles of double sided tape.  By putting a Glue Dot on each punched-out flowers, they basically turn into permanent stickers.

So I don't think it's worth actually writing a "how-to" for the invitations (as I said, they are nothing really that special), but here are some tips:
  • Cardstock: Using a textured cardstock instantly improves the perceived quality of your invitations.  You can find cardstock suppliers online (much cheaper than buying by the sheet at the craft store).  Order a few sample sheets so you can experiment and play around with them before committing to a large order.
  • Vellum: There is something very wedding-y about vellum paper.  You can buy it in packs and print on them at home.  When I printed the text on my vellum at home, I also printed very faint gray lines to mark the corners of the size I wanted my invitation to be.  That made it much easier later to cut down to size using my Exact-o knife and ruler.  (I suppose it would just have been easier if I had a paper cutter....)
  • Ribbon:  I actually also dangled a shell bead in the center of the ribbon (to go along with our "elegant-beach-themed" wedding), but I probably wouldn't do it again because the little bump the ribbon bow made ended up costing us extra in postage!  Just something to think about.
  • Scorer: You can buy an actual scorer, or use the blunt edge of a butter knife.  Score your paper by running over fold lines with a hard edge and a ruler.  This will make your folds clean and straight, especially when using stockier paper.
Make sure you give yourself plenty of time to complete your invitations, and have fun!