
Background:
Grace and I made these paper cones for her wedding and they were surprisingly easy and fun to make! The shimmery, linen-washed cardstock made the cones look super elegant for her wedding and they were only 20 cents each! (on sale at Joann Fabrics). I thought that lacing the ribbon on the cones would be a nice touch since the back of Grace's dress was laced up with a really long ribbon. So here's how it's done:
Materials:
- Cardstock
- Ribbon
- A Yarn needle or sturdy tape
- Scissors or X-acto knife
- Hot glue gun
- Flowers
Directions:
1. Make a template. (If making more than one cone, mark a single sheet of cardstock with where to cut holes. Then reuse the sheet so you know where to cut the holes in the rest of the sheets) a. Cut the square of cardstock to 10 x 10 inches. Position the square in the shape of a diamond and, for the purpose of these instructions, imagine each corner is a cardinal direction (North, East, South, and West)
b. Make a mark 2.25 inches to the right and left of the West and East corners
c. Draw a line connecting each mark to the South corner
d. Measure one inch from the top of each line and make a mark. Then make three marks at every 1.5 inch increment
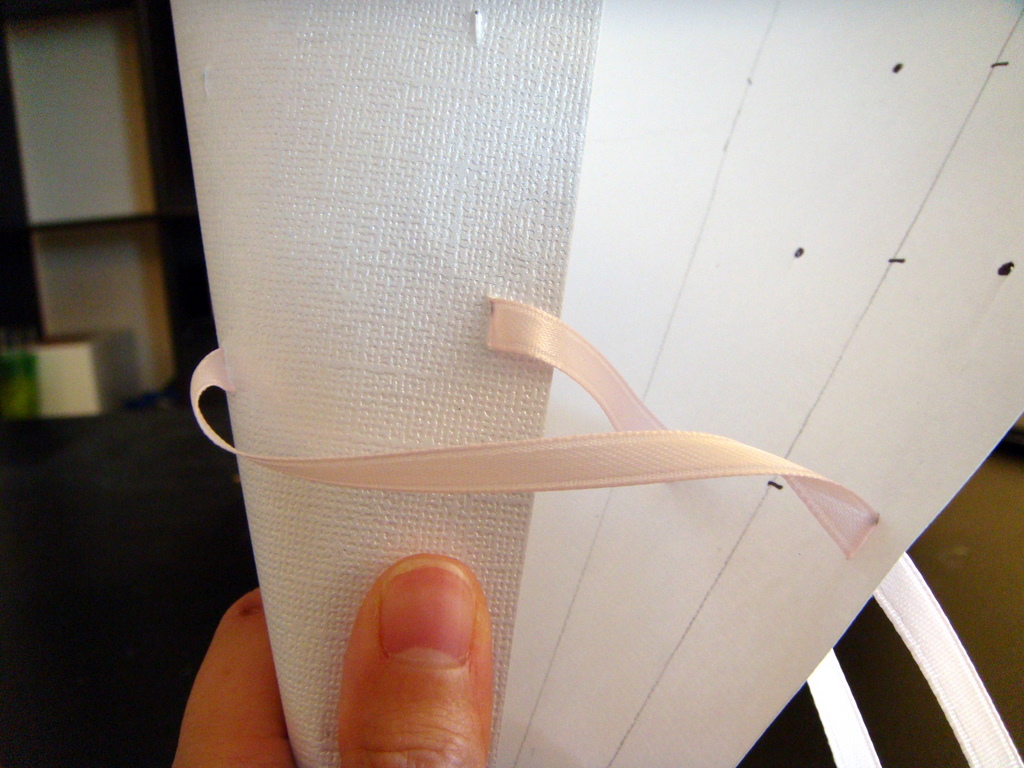
e. Now at every 1.5 inch increment, make a mark 0.75 inches to the left and right of the line. See the first picture in the slideshow for details. These 8 marks will be the holes through which the ribbon will be laced. Make mirroring marks on the other line.

2. Using scissors or a knife, cut slits wide enough for ribbon to be laced through each mark. (Tip: cut the cardstock over a board of Styrofoam.
3. Cut a strand of ribbon—48 inches. If you don’t have a yarn needle, tape each end of the ribbon with tape and cut to a point. (This will make it easier to thread through the cardstock)

4. Starting at the bottom two holes from the inside of the cardstock (the wrong side), lace ribbon through and make sure both ends are the same length.

5. Roll cone into shape so that the holes align with each other. Lace the ribbon as if lacing your shoelaces. TIP: lace one side at a time and keep the cone loose until the ribbon is in place. Then hold cone steadily in place and pull ribbon tight.


6. If desired, tie a bow at the top of the cone.

7. Use hot glue to secure the edge of cardstock against the cone.

8. Fill the cone with flowers and string ribbon through the top of the cone so that you can hang it where you wish.

Have Fun!
No comments:
Post a Comment